Fave-Find Friday: Back to School

Back to the grind, folks! Megan is back in school and Joe’s music students are, too. There’s something comforting about getting back into a routine, isn’t there? At the same time, it’s hard to come down from the high of vacation, which is why we made this little video of our trip to Orcas Island. Hope you enjoy!

From around the web this week:

A list of East Bay patios to enjoy during our “summer.”

We love our fresh and simple bruschetta (ate it for dinner this week, in fact), but this recipe looks like something we might need to try, too.

While we’re at it, let’s also try lavender white chocolate bark. Yum.

A pep talk generator. (Related: Kid President!)

Have you heard of Noisli? It’s white noise to help you focus or relax. Could come in handy this school year!

Homemade Travel Lunchables (for Grown-Ups)

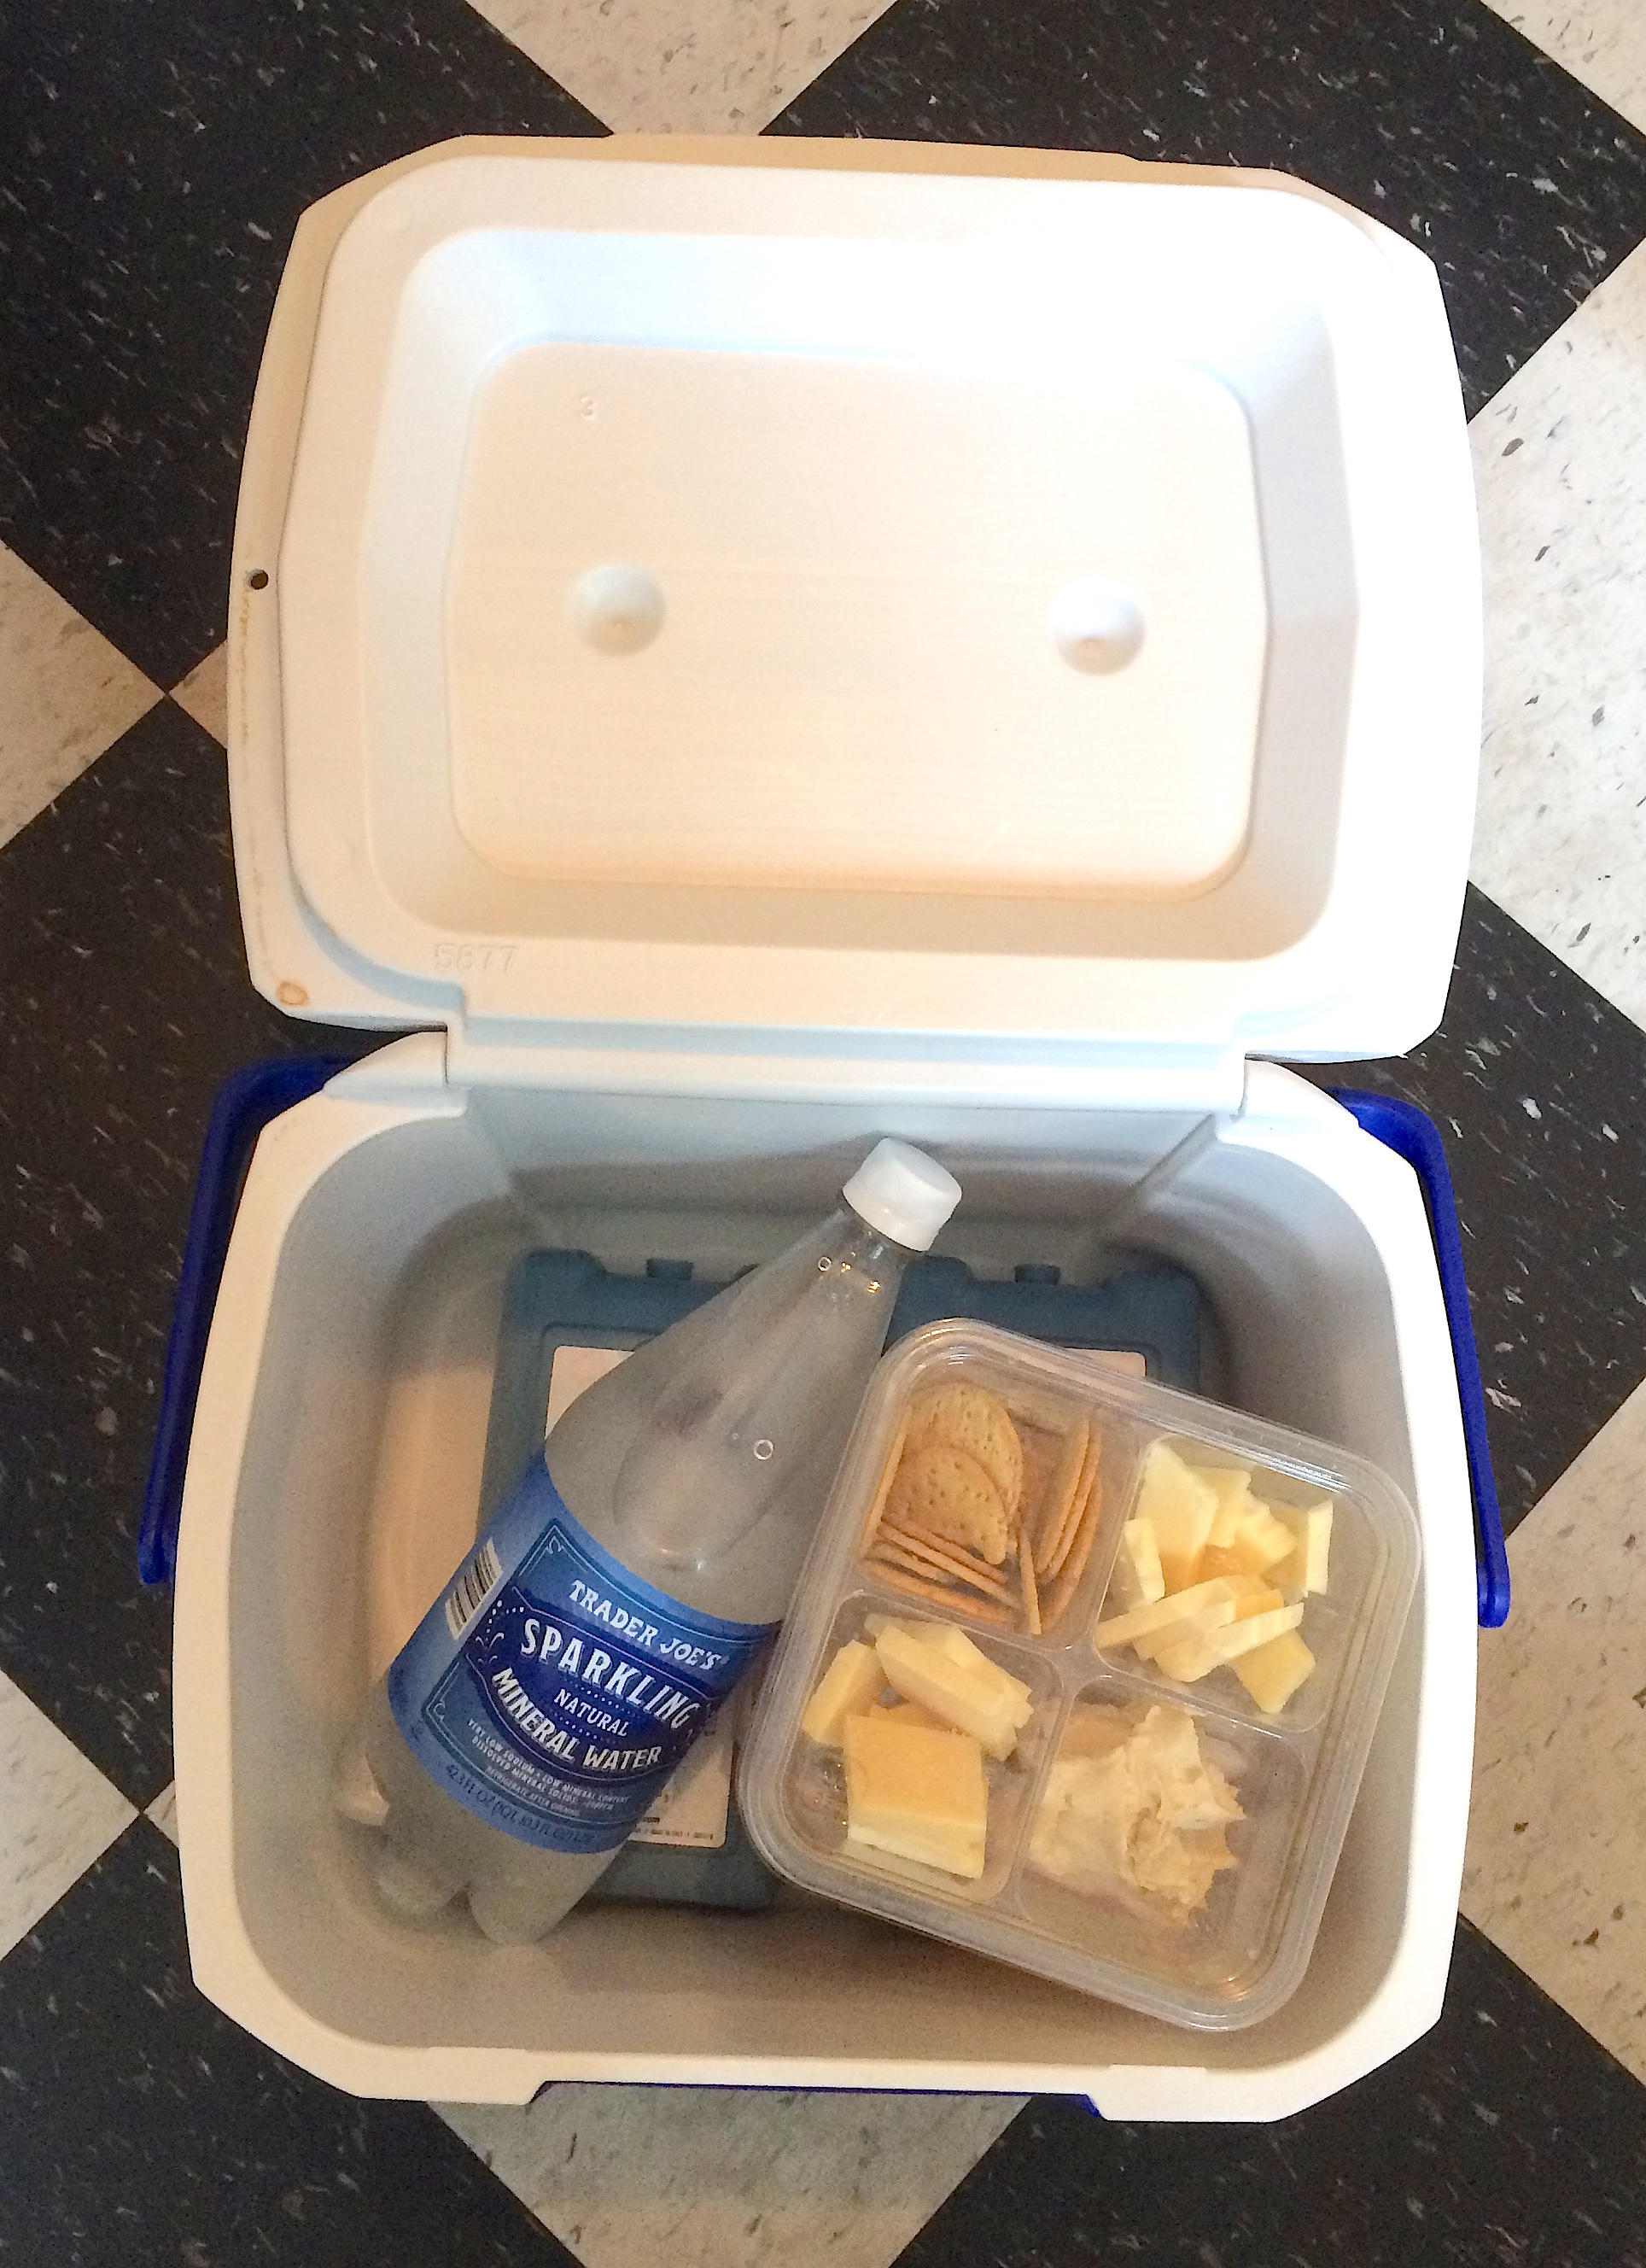
In Megan and Joe’s generation, many of us got to take Lunchables to school every once awhile, and that was a very special day. Hard to say exactly why, as they are (unsurprisingly) packed with artificial ingredients and preservatives. And also kind of revolting to look at. And yet, the idea of it is still so adorably appealing, isn’t it: each food, chopped in bite-sized pieces, in its own little “cubby.”

The Leftovers Project - Lunchables

We recently bought some assorted olives at an olive bar in our local grocery story. Joe’s immediate thought was that the provided containers were kind of like those once-exciting Lunchables, so we decided they’d be great to wash and re-use on our next road trip.

The Leftovers Project - Lunchables

For the long drive down I-5 to LA, we cleaned out our fridge and pantry and filled out lunchables containers with lots of leftovers:

  • Cheddar cheese (two kinds—Joe’s from Vermont, what can we say)
  • Crackers
  • Pistachios
  • Hummus
  • Sliced apple
  • Carrots
  • Peaches and nectarines
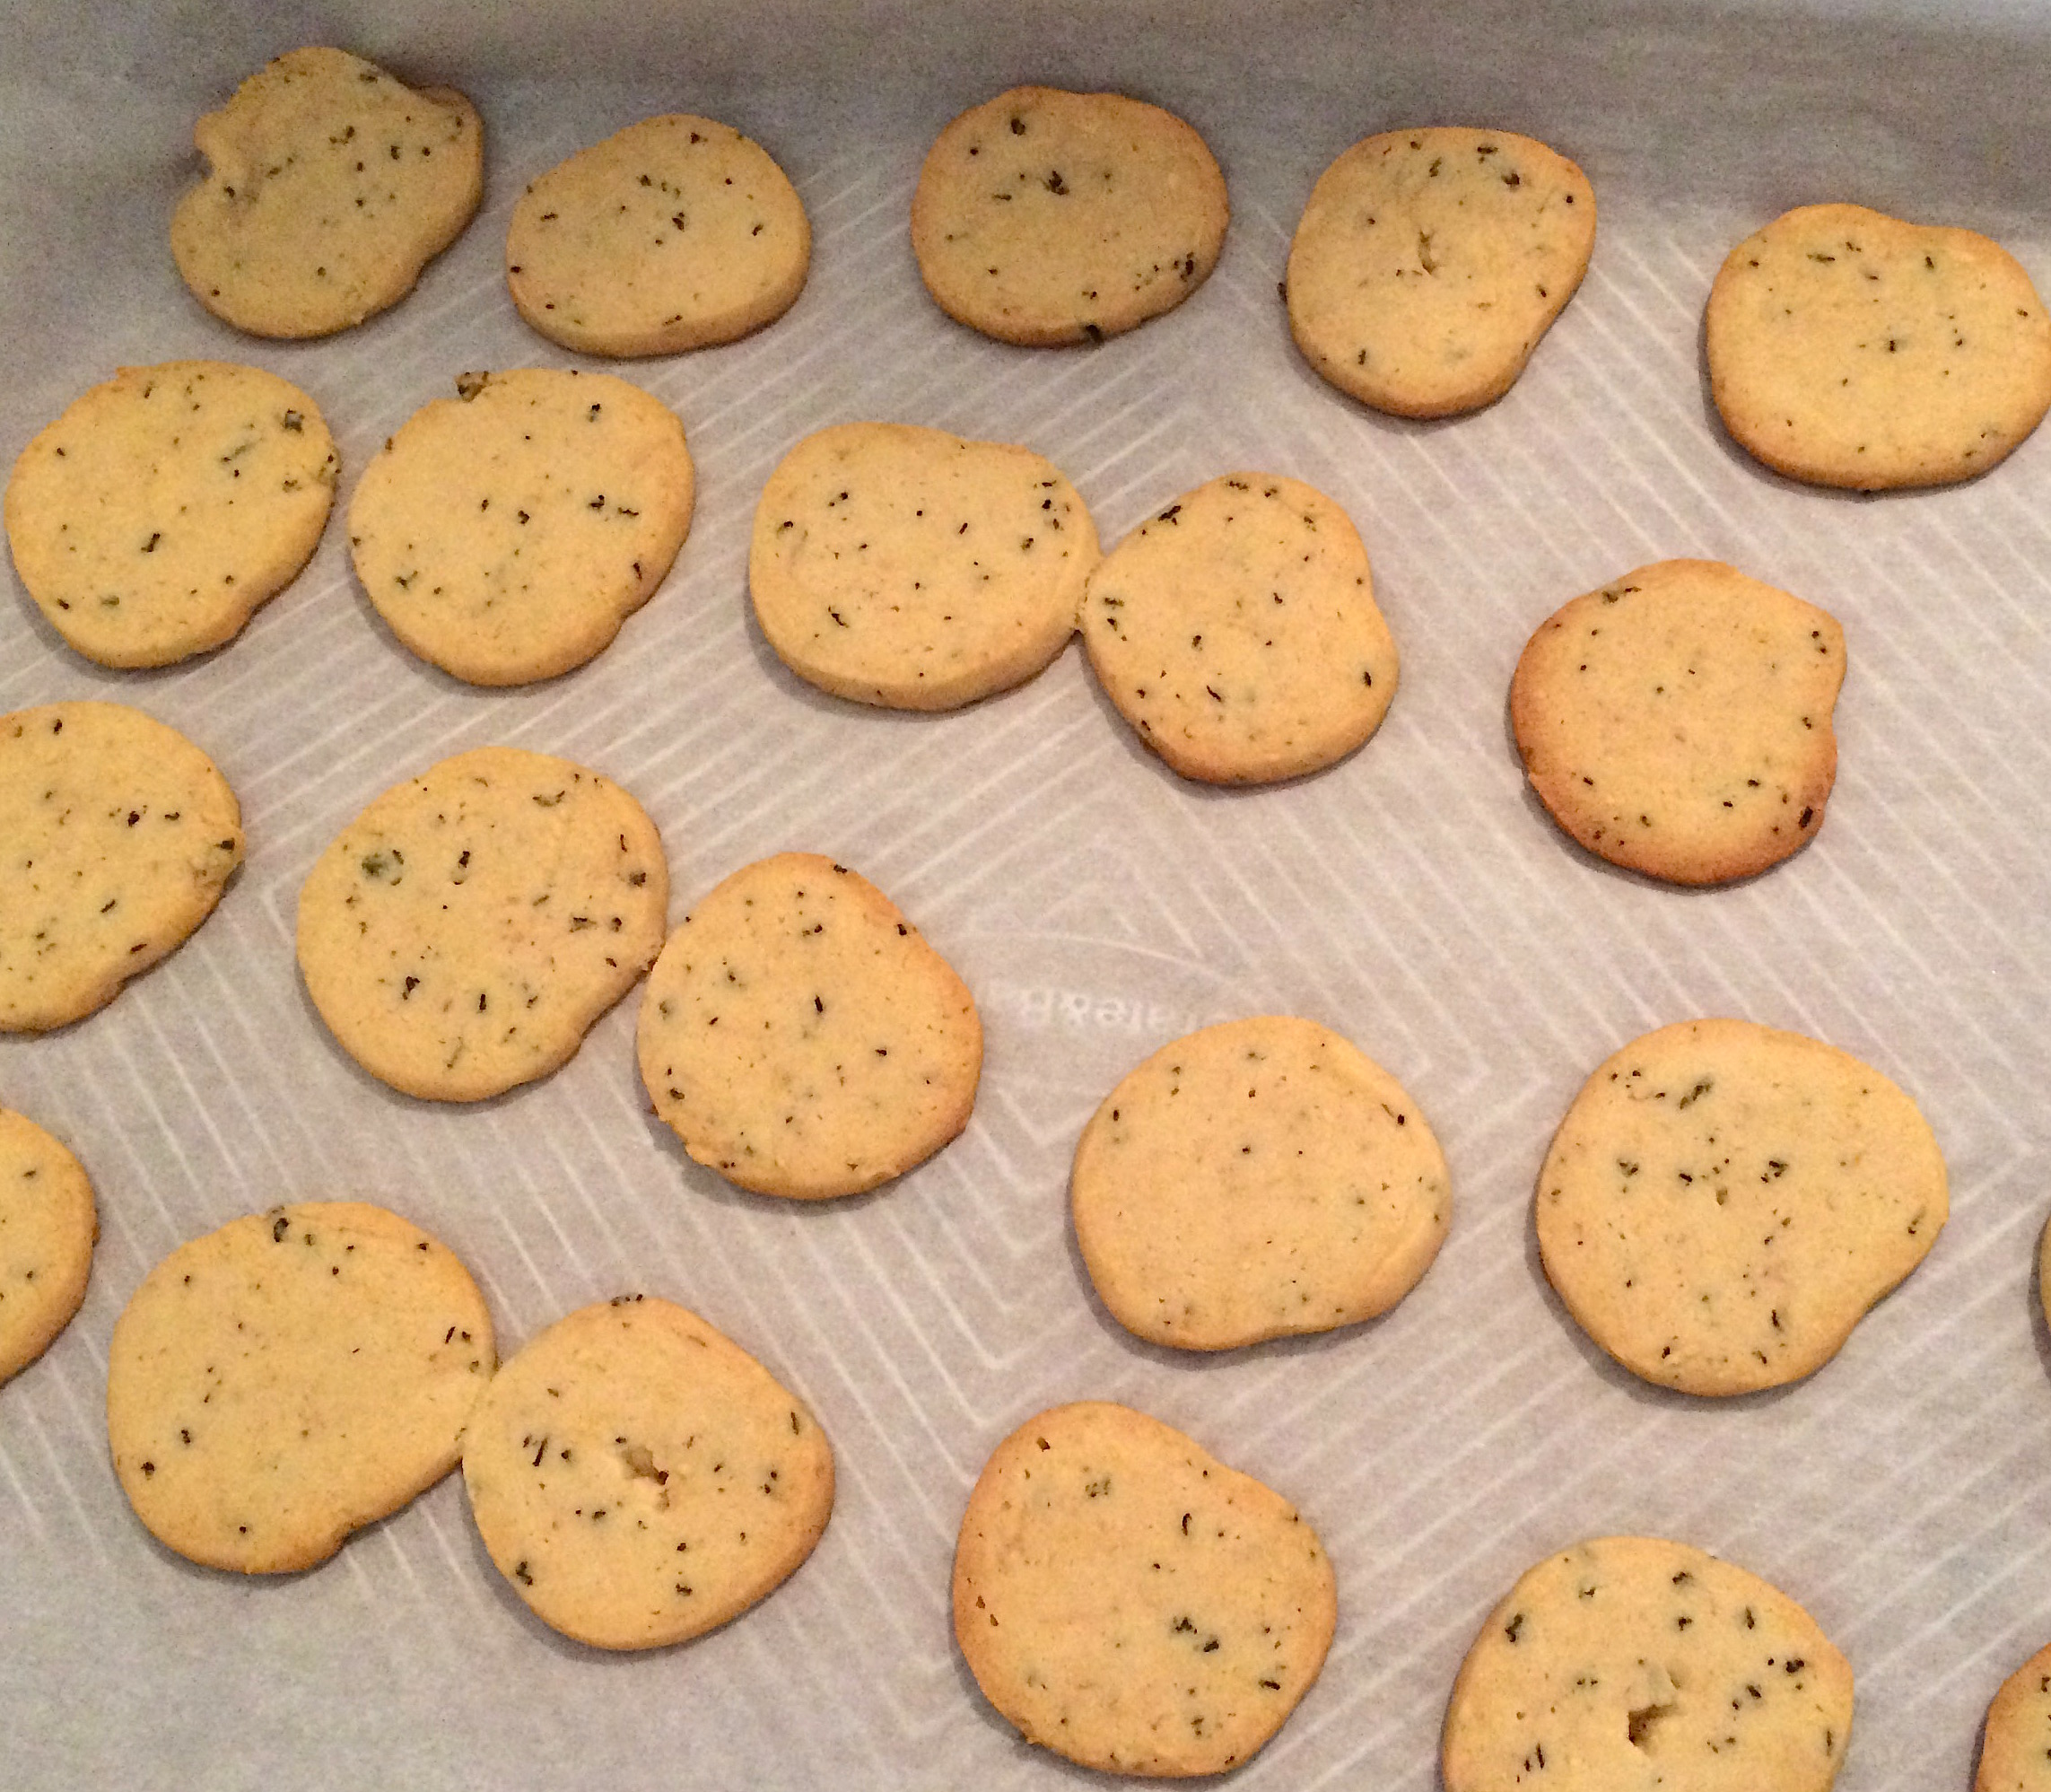
  • Homemade lavender cookies
  • Chocolate
  • Seltzer water

Any kind of divided container can work great to pack healthy snacks on-the-go. We would have loved to include more produce, but this was all we had left in the house. Joe often likes to include some sliced salami, or you can sub in your favorite fruits or veggies (strawberries, grapes, celery, cucumber, orange slices, raisins, pickles, avocado, pineapple, blueberries…) or different cheeses or proteins (cottage cheese, goat cheese with herbs, egg salad, grilled chicken, even yogurt if you don’t required finger-food). Other nice additions would be nuts, granola, or trail mix. The combinations are endless!

The Leftovers Project - Lunchables

Confession: We were pretty thrilled to open up our snacks on the road. We also avoided spending time and money on a stop for overpriced, unhealthy fast food.

What do you like to eat on the road? Do you pack food or eat out? How long of a stop do you allow yourself? Will you try homemade lunchables on your next road trip?

The Leftovers Project - Lunchables

Lavender Cookies

The Leftovers Project - Lavender Cookies

Have you ever cooked with lavender? We have long loved the scent in candles, sachets, massage oil, bath products, or eye pillows for headaches. But once we tried a bite of our friend’s lavender cookies, we knew we needed this recipe!

These cookies are amazingly buttery, light, crunchy, and addicting. The lavender and lemon zest together are a lovely combination. Bet you can’t eat just one!

The Leftovers Project - Lavender Cookies

The Leftovers Project - Lavender Cookies

The Leftovers Project - Lavender Cookies

The Leftovers Project - Lavender Cookies

Lavender Cookies (printable version here)

Ingredients

  • 2 cups flour
  • ¾ teaspoon salt
  • ½ teaspoon baking powder
  • 1 tablespoon very finely chopped dried lavender
  • 2 tablespoons very finely chopped walnuts (use a food processor)
  • 1 tablespoon lemon zest
  • 1½ sticks of unsalted butter, melted
  • 2 tablespoons of honey
  • ½ cup powdered sugar

Directions

Combine flour, salt, baking powder, lavender, walnut powder, and lemon rind in a medium bowl. Using a mixer, cream the butter, honey, and sugar in a large bowl. Add the dry ingredients to it and mix until combined. Spoon dough onto a large piece of parchment or wax paper and roll in the paper to form a log about 18 inches long. The dough will be sticky, so you might need to refrigerate for awhile and roll it again. Refrigerate for at least one hour.

After the dough has hardened, preheat oven to 350˚. Slice the log of dough into ½-inch cookies and arrange on a greased cookie sheet. Bake for 8 to 10 minutes, until they are barely light golden brown on the edges. They should keep, covered, for at least a few days.